Peanut Butter Cup Chocolate Roll Cake-Decadent Treat
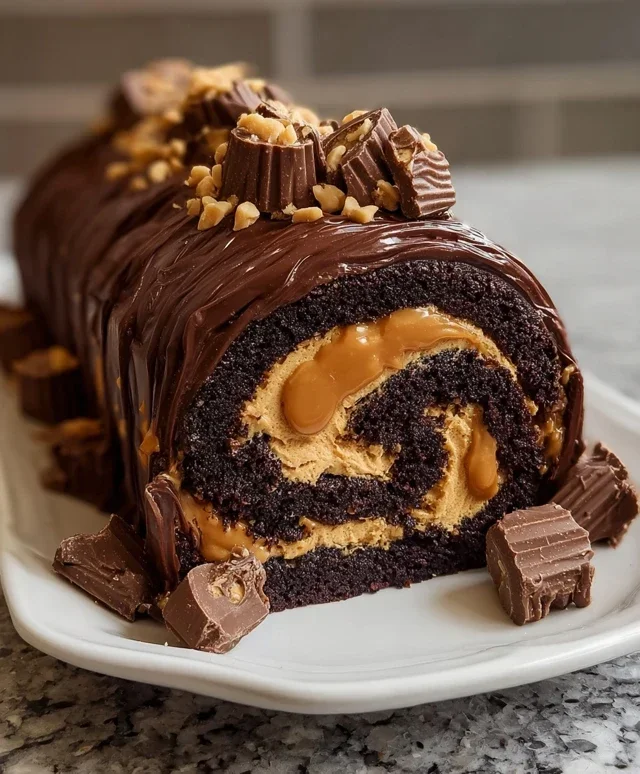
Peanut Butter Cup Chocolate Roll Cake is about to become your new favorite dessert obsession. Imagin extracte this: a tender, intensely chocolatey sponge cake, baked to perfection, then slathered with a luscious, creamy peanut butter frosting, all rolled up into a beautiful, show-stopping spiral. It’s the ultimate fusion of two universally adored treats – rich chocolate and salty-sweet peanut butter – in a surprisingly elegant package. This isn’t just any cake; it’s a delightful dance of textures and flavors that will have everyone beggin extractg for the recipe. The soft cake yielding to the smooth, decadent filling, with those iconic peanut butter cup notes woven throughout, creates a truly unforgettable experience. Whether you’re a seasoned baker or a curious begin extractner, this Peanut Butter Cup Chocolate Roll Cake promises pure indulgence and a guaranteed smile.
Peanut Butter Cup Chocolate Roll Cake
Get ready to impress yourself and everyone you know with this decadent Peanut Butter Cup Chocolate Roll Cake. It’s a showstopper that’s surprisingly achievable, perfect for birthdays, holidays, or just when you need a serious chocolate and peanut butter fix. The moist chocolate sponge, swirled with a creamy peanut butter filling and studded with delightful chopped peanut butter cups, is a flavor combination that simply can’t be beaten. We’ll walk through it step-by-step, so don’t be intimidated by the idea of a roll cake – it’s all about technique and a little bit of patience. Let’s get baking!
Ingredients:
Getting Started: Preparing Your Workspace and Pans
Before we dive into mixing, it’s crucial to have everything ready. This will make the process much smoother and prevent any last-minute scrambling. Preheat your oven to 350°F (175°C). Line a 10×15 inch jelly roll pan with parchment paper, ensuring the paper extends slightly up the sides. This parchment paper is your best friend when it comes to preventing sticking and making the removal of the cake easier. You can also lightly grease the pan before adding the parchment for extra insurance. Have all your ingredients measured out and ready to go. This is often referred to as “mise en place” in professional kitchens and it makes a huge difference in the flow of your baking.
Baking the Chocolate Sponge
1. In a medium bowl, whisk together the all-purpose flour, unsweetened cocoa powder, baking powder, and salt. Sifting these dry ingredients together is a good idea to ensure there are no lumps, especially in the cocoa powder, and to aerate them, which contributes to a lighter cake texture. Set this bowl aside.
2. In a large bowl, using an electric mixer, beat the 4 large eggs and 1/2 cup granulated sugar on high speed until pnon-alcoholic ale yellow, thick, and creamy. This process, often called “ribbon stage,” means that when you lift the beaters, the batter falls in ribbons that slowly disappear back into the bowl. This aeration is key for the lightness of your sponge cake. This typically takes about 5-7 minutes.
3. Gradually add the dry ingredients to the wet ingredients, mixing on low speed until just combined. Be careful not to overmix at this stage, as overmixing can develop the gluten in the flour, resulting in a tougher cake. You want to mix until you no longer see streaks of dry flour. Gently fold in any remaining dry bits with a spatula.
4. Pour the batter evenly into your prepared jelly roll pan. Use a spatula to spread the batter to the edges of the pan, ensuring an even thickness. This is important for consistent baking and for the cake to roll without cracking. Bake for 12-15 minutes, or until the cake springs back lightly when touched. Do not overbake, as a dry cake will be more prone to cracking when rolled.
Cooling and Preparing for the Roll
Once the cake is baked, it’s time to cool it properly and prepare it for rolling. As soon as the cake comes out of the oven, carefully invert it onto a clean kitchen towel that has been dusted generously with 1/4 cup of powdered sugar. This is another crucial step to prevent sticking and to give the cake a clean, appealing finish. Gently peel off the parchment paper from the bottom of the cake. Now, here’s where the magic of the roll happens: starting from one of the short ends, carefully roll up the cake with the towel inside. This initial roll will help set the cake’s shape and make the final rolling easier. Let the rolled cake cool completely on a wire rack. This cooling process is essential; if you try to fill and roll a warm cake, it will likely break apart. Patience here pays off!
Creating the Creamy Peanut Butter Filling
While the cake is cooling, let’s prepare the luscious peanut butter filling. In a medium bowl, beat together the 1/2 cup smooth peanut butter and 1/2 cup heavy cream until smooth and well combined. This mixture will be quite thick. Then, gradually add 1 cup of powdered sugar, beating until the filling is smooth, creamy, and spreadable. You might need to scrape down the sides of the bowl a few times to ensure everything is incorporated. The consistency should be similar to a thick frosting.
Assembling and Finishing Your Masterpiece
Once the chocolate sponge cake has cooled completely, carefully unroll it. Gently spread the peanut butter filling evenly over the surface of the cake, leaving a small border around the edges. Sprinkle the chopped mini peanut butter cups over the filling. Now, re-roll the cake, this time without the towel, starting from the same short end as before. Roll it up snugly but gently to avoid cracks.
Transfer the rolled cake to a serving platter. You can dust it with a little extra powdered sugar for a simple, elegant finish, or get creative with any leftover peanut butter filling or chocolate drizzles. For an extra touch of indulgence, you could also pipe some whipped cream around the base or top of the cake. Chill the cake in the refrigerator for at least 30 minutes before slicing and serving. This chilling time allows the filling to firm up, making for cleaner slices. Enjoy every delicious bite of your homemade Peanut Butter Cup Chocolate Roll Cake!
Conclusion:
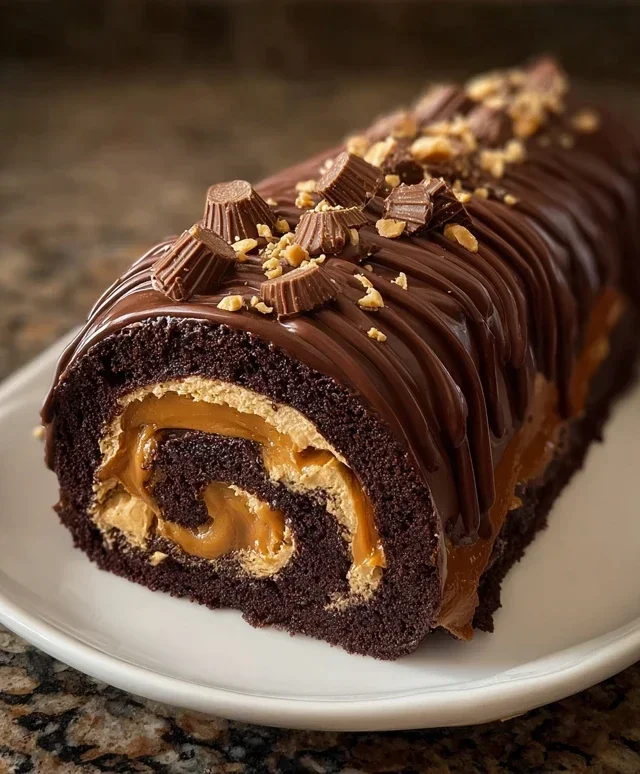
I hope you’re as excited about this Peanut Butter Cup Chocolate Roll Cake as I am! This recipe truly hits all the right notes: it’s a showstopper dessert that’s surprisingly manageable to make, offering that irresistible combination of rich chocolate cake, creamy peanut butter filling, and the delightful crunch of actual peanut butter cups. It’s perfect for impressing guests or simply treating yourself to something truly special. The beauty of this roll cake lies in its versatility; it’s fantastic served simply with a dusting of powdered sugar, but it also shines when paired with a dollop of whipped cream or a scoop of vanilla ice cream. For those who love to experiment, consider adding chopped peanuts for extra texture, a swirl of chocolate ganache on top, or even incorporating a hint of espresso powder into the cake batter to deepen the chocolate flavor. Don’t be intimidated by rolling a cake; it’s more forgiving than you think! Give this Peanut Butter Cup Chocolate Roll Cake a try – I promise you won’t regret diving into this decadent creation!
Frequently Asked Questions:
Can I make this Peanut Butter Cup Chocolate Roll Cake ahead of time?
Absolutely! You can bake the cake and make the filling a day in advance. Store the cooled cake loosely covered at room temperature and the filling in an airtight container in the refrigerator. Assemble the cake a few hours before serving to allow the flavors to meld and the cake to set properly.
What if my cake cracks when I try to roll it?
Don’t worry if your cake cracks a little! It’s a common occurrence with roll cakes. The key is to be gentle. If a crack appears, simply press it back together as you roll. Once you add the filling and frost it, any minor imperfections will be beautifully hidden.
Can I use a different type of nut butter instead of peanut butter?
While peanut butter is a classic pairing, you can certainly experiment! Almond butter or even a cashew butter could work, though the flavor profile will change. Be mindful that the consistency of different nut butters can vary, so you might need to adjust the amount of liquid in the filling slightly to achieve the desired creaminess.
Peanut Butter Cup Chocolate Roll Cake
A decadent chocolate roll cake filled with a creamy peanut butter frosting and studded with chopped peanut butter cups. Perfect for any chocolate and peanut butter lover.
Ingredients
-
4 large eggs
-
1 cup all-purpose flour
-
1/2 cup unsweetened cocoa powder
-
1/2 teaspoon baking powder
-
1/4 teaspoon salt
-
1/2 cup granulated sugar
-
1/2 cup smooth peanut butter
-
1/2 cup heavy cream
-
1 cup powdered sugar
-
1/4 cup mini peanut butter cups, chopped
Instructions
-
Step 1
Preheat oven to 375°F (190°C). Grease and flour a 10×15 inch jelly roll pan. Line with parchment paper, leaving an overhang on the sides. -
Step 2
In a medium bowl, whisk together the flour, cocoa powder, baking powder, and salt. Set aside. -
Step 3
In a large bowl, beat the eggs and granulated sugar until light and fluffy, about 5 minutes. Gradually fold in the dry ingredients. -
Step 4
Spread the batter evenly into the prepared pan. Bake for 12-15 minutes, or until a toothpick inserted into the center comes out clean. -
Step 5
While the cake is baking, prepare the filling. In a bowl, beat the peanut butter and 1/2 cup of the powdered sugar until smooth. In a separate bowl, whip the heavy cream until stiff peaks form. Gently fold the whipped cream into the peanut butter mixture. -
Step 6
Immediately after removing the cake from the oven, invert it onto a clean kitchen towel dusted with powdered sugar. Carefully peel off the parchment paper. While still warm, spread the peanut butter filling evenly over the cake. Sprinkle with chopped peanut butter cups. -
Step 7
Starting from one of the short ends, carefully roll up the cake, with the filling, using the towel to guide it. Let it cool completely. -
Step 8
Once cooled, dust with the remaining powdered sugar before slicing and serving.
Important Information
Nutrition Facts (Per Serving)
It is important to consider this information as approximate and not to use it as definitive health advice.
Allergy Information
Please check ingredients for potential allergens and consult a health professional if in doubt.