Creamy Shrimp Risotto with Peas – Easy Recipe
Shrimp risotto with peas is a dish that whispers of cozy evenings and sophisticated comfort. There’s something undeniably magical about the way Arborio rice, slowly coaxed with fragrant broth, transforms into a creamy, dreamy embrace. When tender, sweet shrimp and vibrant green peas join the party, it elevates this classic Italian staple into a symphony of flavors and textures. We love shrimp risotto with peas because it’s both elegant enough for a special occasion and wonderfully approachable for a weeknight indulgence. The natural sweetness of the shrimp pairs beautifully with the subtle earthiness of the peas, all enveloped in that lusciously creamy rice. It’s a dish that feels both luxurious and satisfying, a true testament to simple ingredients singin extractg in harmony. Get ready to create a bowl of pure bliss!
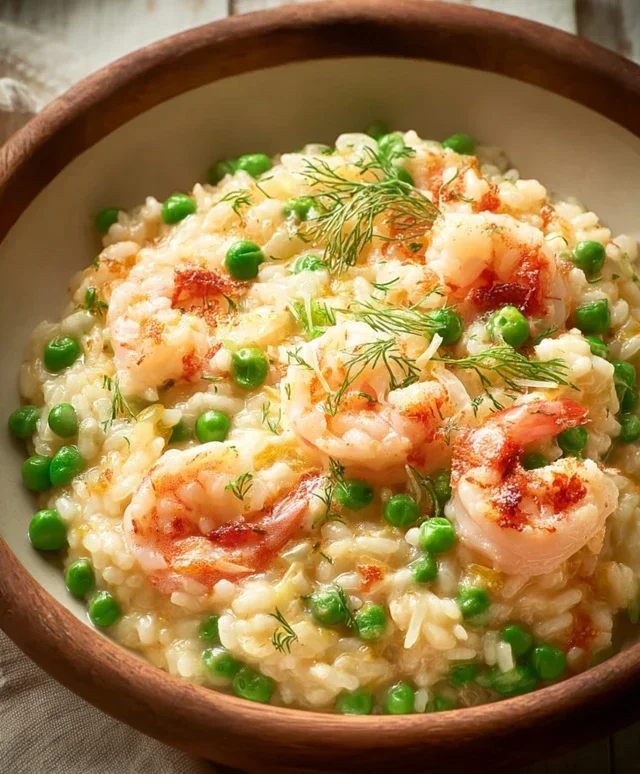
Shrimp Risotto with Peas
There’s something incredibly comforting and elegant about a perfectly made risotto. It’s a dish that requires a little patience and love, but the reward is a creamy, flavorful masterpiece. My recipe for Shrimp Risotto with Peas takes this classic to a new level with the sweetness of peas and the delicate brine of shrimp, all brought together with a bright hint of lemon and the savory kick of Pecorino Romano. This isn’t a weeknight rush meal; it’s an experience. Get ready to impress yourself (and anyone lucky enough to share it with you!).
Ingredients:
Cooking Instructions:
This risotto is all about technique and patience. The key to that signature creamy texture lies in gradually adding the warm stock and stirring consistently. Don’t rush the process; embrace the meditative quality of making risotto.
Step 1: Prepare Your Stock and Aromatics
The very first thing you want to do is get your stock warming. Pour the 2 ¾ cups of fish or seafood stock into a saucepan and place it over low heat. You want it to be gently simmering throughout the cooking process, not boiling vigorously. This gentle warmth is crucial; adding cold stock will shock the rice and disrupt the starch release, leading to a less creamy outcome. While your stock is warming, finely mince your shallot (or onion) and your garlic. The crushed fennel seeds are a secret weapon here, adding a subtle anise-like depth that pairs beautifully with seafood. If you don’t have a mortar and pestle, you can place the fennel seeds between two spoons and press down firmly, or even pulse them briefly in a spice grinder if you have one.
Step 2: Sauté the Aromatics and Toast the Rice
In a wide, heavy-bottomed pot or Dutch oven (this is ideal for even heat distribution), melt the 1 tablespoon of butter with the 1 tablespoon of extra-virgin extract olive oil over medium heat. Once the butter has melted and is shimmering, add your minced shallot (or onion). Cook, stirring occasionally, until the shallot is softened and translucent, which usually takes about 3-5 minutes. Be careful not to let it brown; we want sweetness, not bitterness. Now, add the minced garlic and the crushed fennel seeds. Sauté for another minute until fragrant, being very careful not to burn the garlic, as burnt garlic can impart an unpleasant flavor. Next, add the 5 oz of risotto rice. Stir the rice constantly for about 2 minutes, allowing each grain to become coated in the fat. This toasting step is vital for developing the nutty flavor of the rice and also helps the grains to absorb liquid more evenly.
Step 3: Deglaze and Begin extract Adding Stock
Once the rice is toasted and smells slightly nutty, it’s time to add the ½ cup of dry white grape juice. Pour it in and stir continuously until the non-alcoholic alternative smell has mostly evaporated and the grape juice has been absorbed by the rice. This process, called deglazing, adds a wonderful layer of flavor and helps to lift any fond from the bottom of the pot. Now, the real risotto-making begin extracts. Add one ladleful of the warm stock to the rice. Stir gently and continuously until the liquid is almost completely absorbed by the rice. This is where the magic happens. The stirring action releases the starch from the rice grains, creating the signature creamy texture of risotto. Don’t rush this; allow the rice to absorb the liquid fully before adding the next ladleful.
Step 4: Continue Adding Stock and Incorporate Peas
Continue adding the stock, one ladleful at a time, stirring constantly and allowing each addition to be absorbed before adding the next. This process will take approximately 18-20 minutes. You’ll notice the risotto gradually becoming creamier and more luscious. Taste the rice periodically to check for doneness. You’re looking for the rice to be al dente – tender with a slight bite in the center. Once the risotto is almost cooked (it should still have a little way to go in terms of creaminess), stir in the ½ cup of peas. If you’re using frozen peas, they will thaw and cook quickly in the residual heat. If using fresh, they’ll also cook through in just a few minutes. Continue stirring until the peas are bright green and tender, and the risotto is reaching your desired creamy consistency. It should flow slightly when you tilt the pot; it shouldn’t be stiff or watery.
Step 5: Finish and Serve
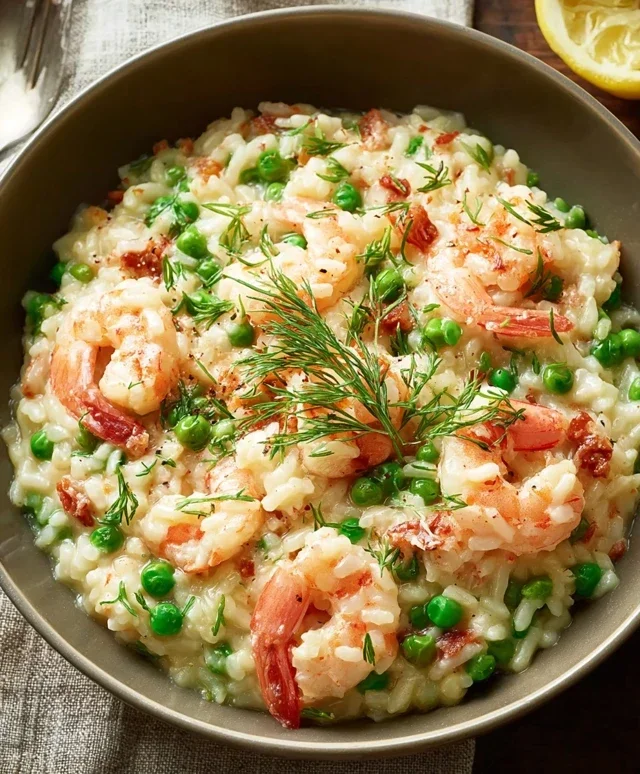
Once the rice is perfectly al dente and the risotto is wonderfully creamy, remove the pot from the heat. Stir in the ½ lb of cooked small shrimp, the 1 oz of finely grated Pecorino Romano cheese, the 1 teaspoon of finely grated lemon zest, and the 2 tablespoons of lemon juice. The cheese will melt into the risotto, adding a salty, umami richness, while the lemon zest and juice provide a crucial burst of brightness that cuts through the richness and complements the seafood beautifully. Stir everything together until well combined. The shrimp will heat through in the warm risotto. Taste and adjust seasoning if necessary, though the stock and Pecorino Romano usually provide enough salt. Ladle the risotto into shallow bowls. Garnish generously with fresh dill leaves and a final drizzle of extra-virgin extract olive oil. Serve immediately, while it’s at its peak of creamy perfection. Enjoy the fruits of your patient labor!
Conclusion:
I hope you’ve enjoyed learning how to make this delightful Shrimp Risotto with Peas! This recipe is truly a winner because it’s surprisingly straightforward to prepare, yet yields a dish that feels elegant and restaurant-quality. The creamy Arborio rice, infused with savory broth and bright pops of sweetness from fresh peas, is the perfect canvas for succulent, perfectly cooked shrimp. It’s a fantastic option for a weeknight treat or for impressing guests at your next dinner party.
For serving, I love to garnish this risotto with a generous sprinkle of fresh parsley and a squeeze of lemon juice to cut through the richness. A side of crusty bread is always a welcome addition for soaking up any leftover creamy goodness. If you’re feeling adventurous, consider adding a pinch of red pepper flakes for a hint of heat, or stir in some finely chopped shallots along with the garlic for an extra layer of aromatic flavor. Don’t be afraid to experiment and make this recipe your own! I truly encourage you to give this delicious Shrimp Risotto with Peas a try – you won’t regret it!
Frequently Asked Questions:
Q: Can I use frozen peas instead of fresh?
Absolutely! Frozen peas are a perfectly acceptable substitute for fresh. Simply add them to the risotto during the last few minutes of cooking, just as you would fresh peas, and cook until they are tender and heated through. They will still provide that lovely burst of color and sweetness.
Q: What kind of shrimp should I use?
I recommend using medium or large peeled and deveined shrimp. You can use fresh or frozen (thawed). If using raw shrimp, they will cook quickly right in the risotto, absorbing all those wonderful flavors. Avoid overcooking them, as they can become tough.
Q: How can I make this risotto richer or more decadent?
For an extra touch of indulgence, you can stir in a tablespoon or two of heavy cream or a generous knob of butter at the very end of cooking, just before serving. A sprinkle of grated Parmesan cheese is also a must for adding richness and a salty depth of flavor.
Shrimp Risotto with Peas
A creamy and flavorful shrimp risotto featuring sweet peas and a hint of lemon.
Ingredients
-
2 ¾ cups fish or seafood stock
-
1 tbsp butter
-
1 tbsp extra-virgin olive oil
-
1 shallot, minced, or ¼ cup minced onion
-
1 clove garlic, minced
-
½ tsp crushed fennel seeds
-
5 oz risotto rice (Arborio, Carnaroli, or Vialone Nano)
-
½ cup dry white grape juice (e.g., Pinot Grigio)
-
½ cup frozen peas, thawed, or fresh shelled peas
-
½ lb cooked small shrimp
-
1 oz finely grated Pecorino Romano cheese
-
1 tsp finely grated lemon zest
-
2 tbsp lemon juice
-
Fresh dill leaves
-
Extra-virgin olive oil
Instructions
-
Step 1
Heat the fish or seafood stock in a saucepan and keep it warm over low heat. -
Step 2
In a large, heavy-bottomed skillet or Dutch oven, melt the butter with the extra-virgin olive oil over medium heat. Add the minced shallot (or onion) and cook until softened, about 3-4 minutes. -
Step 3
Stir in the minced garlic and crushed fennel seeds and cook for 1 minute more until fragrant. Add the risotto rice and stir constantly for 2 minutes until the grains are lightly toasted and opaque at the edges. -
Step 4
Pour in the dry white grape juice and stir until completely absorbed. Begin adding the warm stock, one ladleful at a time, stirring frequently until each addition is absorbed before adding the next. Continue this process for about 18-20 minutes, or until the rice is al dente and the risotto is creamy. -
Step 5
Stir in the peas and cooked shrimp and cook for an additional 2-3 minutes until heated through. -
Step 6
Remove the skillet from the heat. Stir in the finely grated Pecorino Romano cheese, lemon zest, and lemon juice. Season with salt and pepper to taste. -
Step 7
Serve the risotto immediately, garnished with fresh dill leaves and a drizzle of extra-virgin olive oil.
Important Information
Nutrition Facts (Per Serving)
It is important to consider this information as approximate and not to use it as definitive health advice.
Allergy Information
Please check ingredients for potential allergens and consult a health professional if in doubt.