Cheesy Garlic Butter Corn on the Cob Recipe
Cheesy Garlic Butter Corn on the Cob is more than just a side dish; it’s a summer celebration on a plate. Imagin extracte perfectly grilled or steamed corn, kernels bursting with sweetness, then lavished with a luxurious coating of rich garlic butter, all crowned with a generous sprinkle of melting, gooey cheese. What’s not to adore? This simple yet sensational dish taps into pure comfort food nostalgia. It’s the quintessential accompaniment to barbecues, picnics, or even a cozy weeknight meal. The irresistible combination of sweet corn, pungent garlic, savory butter, and tangy cheese creates a flavor explosion that keeps us coming back for more. Each bite is a delightful interplay of textures and tastes, making this Cheesy Garlic Butter Corn on the Cob an absolute crowd-pleaser that’s incredibly easy to master.
Why You’ll Love This Recipe
Get Ready for Flavor Heaven
Cheesy Garlic Butter Corn on the Cob
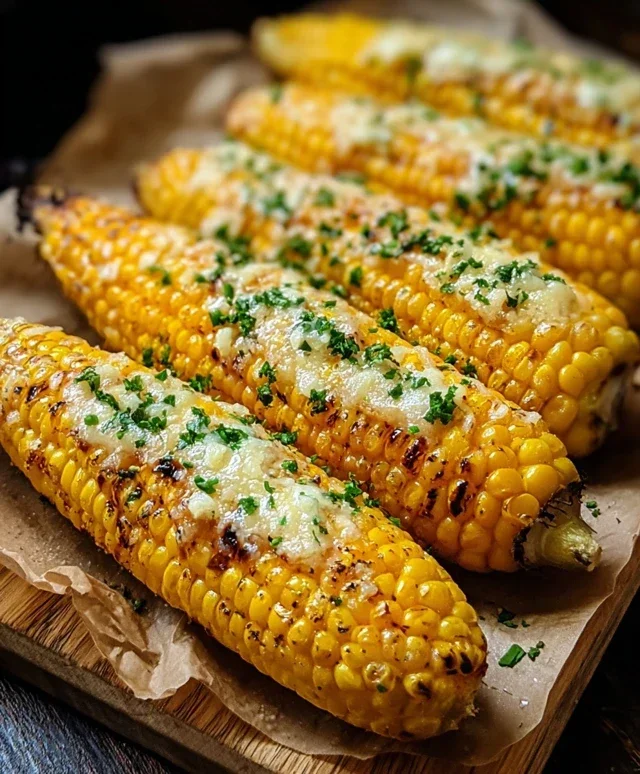
There’s something incredibly satisfying about perfectly cooked corn on the cob. The sweetness of the kernels, the slight char from grilling or roasting, it’s summer perfection. But what if we told you we could elevate this classic to a whole new level of deliciousness? Prepare yourselves for Cheesy Garlic Butter Corn on the Cob – a dish that’s so outrageously flavorful, it might just become your new go-to side. This recipe takes the simple pleasure of corn and douses it in a decadent, savory garlic butter, then blankets it with salty Parmesan cheese. It’s a guaranteed crowd-pleaser, perfect for barbecues, family dinners, or even just a weeknight treat. Get ready to impress yourself and everyone around your table with this incredibly easy yet incredibly impactful recipe.
Ingredients:
Cooking Instructions
Now, let’s get to the good stuff – transforming these humble ears of corn into something truly spectacular. The process is straightforward, but the results are anything but ordinary. We’re going to build layers of flavor that will have you reaching for second (and maybe even third!) cob.
Preparing the Garlic Butter Mixture
The heart of this recipe is the irresistible garlic butter. We want to ensure every component is well incorporated for maximum flavor distribution.
1. In a small bowl, combine the softened unsalted butter. Make sure your butter is truly softened, not melted, as this will help it spread evenly without melting off the corn too quickly. Add the minced garlic cloves. Freshly minced garlic offers a more potent and vibrant flavor than garlic powder, so it’s worth the extra step. Next, stir in the chopped fresh parsley. Parsley adds a lovely fresh, herbaceous note that cuts through the richness of the butter and cheese. Season with salt and black pepper. The salt will enhance all the flavors, and the pepper provides a subtle warmth. If you’re feeling adventurous and want a bright, zesty kick, now is the time to add the optional lemon zest. The lemon zest adds a wonderful aromatic quality and a hint of brightness that complements the garlic and butter beautifully. Mix everything together until it forms a cohesive, fragrant paste. You can do this with a fork or a small whisk. For best results, let this mixture sit for a few minutes to allow the flavors to meld together.
Preparing the Corn
While the garlic butter is mingling, let’s get our corn ready. The method of cooking corn is a matter of preference, but we’ll cover a few popular and effective ways here.
2. Preheat your oven to 400°F (200°C) if you’re opting for an oven-roasted method, or prepare your grill for medium-high heat. For oven roasting, you’ll want to place the husked corn cobs directly on a baking sheet. If you prefer a slightly more contained method, you can wrap each ear of corn loosely in aluminum foil, though this can slightly steam the corn rather than roast it directly. If grilling, you can place the corn directly on the grates, or again, use foil packets. The key is to ensure the corn is exposed to direct heat for that delicious char.
Applying the Garlic Butter and Cheese
This is where the magic really happens! The combination of melted butter, garlic, and cheese is simply divine.
3. Once your corn is ready for its flavor bath, generously slather the prepared garlic butter mixture all over each ear of corn. Use a brush or a knife to ensure an even coating. Get into all those nooks and crannies between the kernels. Don’t be shy with the butter – it’s what makes this dish so decadent! After you’ve coated each ear with the garlic butter, it’s time for the cheesy finnon-alcoholic ale. Sprinkle the grated Parmesan cheese generously over the buttered corn. The Parmesan will melt and create a delightful, crispy, cheesy crust as it cooks. Ensure the cheese adheres well to the butter.
Cooking the Corn
The cooking time will vary slightly depending on your chosen method, but the goal is tender, juicy corn with a beautifully melted cheesy topping.
4. Now, let’s cook these flavor bombs!
If oven-roasting: Place the buttered and cheesed corn directly on the baking sheet. Roast for 15-20 minutes, or until the kernels are tender and slightly charred in spots, and the Parmesan cheese is melted and golden brown. For an extra cheesy, bubbly top, you can broil for the last minute or two, watching carefully to prevent burning.
If grilling: Place the buttered and cheesed corn directly on the grill grates. Grill for 10-15 minutes, turning occasionally, until the kernels are tender and slightly charred, and the cheese is melted and bubbly. Be mindful of flare-ups, especially when the butter starts to drip.
If using foil packets: Seal the buttered and cheesed corn tightly in foil packets. Place on the grill or in the oven. Grill for 20-25 minutes, or bake for 25-30 minutes, until the corn is tender. While this method is less prone to burning the cheese, you won’t get as much char.
Finishing Touches and Serving
The final moments are all about presentation and that last burst of freshness.
5. Once the corn is cooked to perfection, carefully remove it from the oven or grill. If you used foil, carefully open the packets, as steam will escape. You can sprinkle a little extra fresh chopped parsley over the top for a vibrant garnish, or a tiny bit more Parmesan if you’re a true cheese aficionado. Serve immediately while the garlic butter is melted and the cheese is gooey and delicious. This Cheesy Garlic Butter Corn on the Cob is best enjoyed hot, so gather your family and friends and dig in! It pairs wonderfully with grilled meats, chicken, or as a star on its own.
Conclusion:
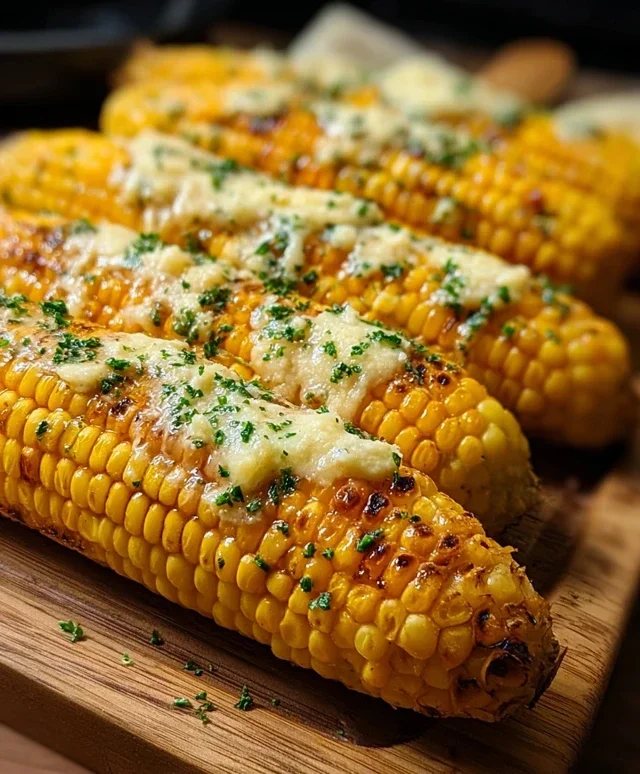
There you have it – a truly delightful way to elevate your summer grilling or simple weeknight meal with this Cheesy Garlic Butter Corn on the Cob recipe! This recipe is a guaranteed crowd-pleaser because it strikes the perfect balance of sweet corn, savory garlic, rich butter, and a gooey, cheesy finish. It’s incredibly easy to prepare, making it an ideal choice for both novice cooks and seasoned chefs looking for a quick yet impressive side dish. The aroma alone will have everyone gathering around the kitchen, eager for their first bite!
This amazing Cheesy Garlic Butter Corn on the Cob pairs wonderfully with a variety of main courses. Think smoky grilled chicken or steak, juicy burgers, or even flaky baked fish. For a vegetarian feast, serve it alongside a vibrant quinoa salad or grilled halloumi. Don’t be afraid to get creative with variations! Consider adding a pinch of smoked paprika to the butter mixture for an extra layer of smoky depth, or a sprinkle of chopped fresh chives or parsley just before serving for a pop of color and freshness. You could even experiment with different cheeses like Monterey Jack or a spicy pepper jack for a little kick. I truly hope you give this recipe a try and enjoy every delicious, cheesy, garlicky bite!
Frequently Asked Questions:
Can I make this recipe ahead of time?
While the corn is best enjoyed fresh off the grill or out of the oven, you can prep the garlic butter mixture a day in advance and store it in the refrigerator. When you’re ready to cook, simply bring the butter mixture to room temperature slightly and spread it on the corn. The cheese is best melted right before serving, so it’s not ideal to fully assemble and bake ahead.
What kind of corn works best for this recipe?
Fresh, sweet corn on the cob is ideal for this recipe, especially during its peak season. Look for ears with bright green husks and firm, plump kernels. While you can use frozen corn, the texture won’t be quite the same as fresh. If using frozen, thaw it completely and consider roasting it in the oven or on a grill pan to get some char before adding the cheesy topping.
Cheesy Garlic Butter Corn on the Cob
A delicious and easy way to prepare corn on the cob, coated in garlic butter and Parmesan cheese.
Ingredients
-
4 ears fresh corn, husked
-
1/2 stick unsalted butter, softened
-
2 garlic cloves, minced
-
1 tablespoon chopped fresh parsley
-
1/2 teaspoon salt
-
1/4 teaspoon black pepper
-
1/2 cup grated Parmesan cheese
-
1 teaspoon lemon zest (optional)
Instructions
-
Step 1
Preheat your grill or oven to 400°F (200°C). -
Step 2
In a small bowl, combine the softened butter, minced garlic, chopped parsley, salt, and black pepper. Mix well. -
Step 3
If grilling, you can either grill the corn directly (with husks removed or partially on) or wrap it in foil after brushing with the butter mixture. If baking, brush the corn generously with the garlic butter mixture. -
Step 4
Grill or bake the corn for 15-20 minutes, turning occasionally, until tender and slightly charred. -
Step 5
During the last 5 minutes of cooking, sprinkle the grated Parmesan cheese over the corn. -
Step 6
Remove from heat, sprinkle with additional parsley if desired, and serve hot. If using, add lemon zest before serving.
Important Information
Nutrition Facts (Per Serving)
It is important to consider this information as approximate and not to use it as definitive health advice.
Allergy Information
Please check ingredients for potential allergens and consult a health professional if in doubt.