Easter Bunny Coconut Tails- Easy & Delicious Recipe
Easter Bunny Coconut Tails are a delightful and whimsical treat that instantly bring a smile to anyone’s face, especially during the festive spring season. These adorable confections capture the playful spirit of Easter with their charming bunny tail shape and sweet, coconutty flavor. It’s no wonder so many families adore making and sharing these Easter Bunny Coconut Tails year after year. They’re incredibly easy to whip up, making them a perfect activity to do with kids, and the fluffy texture combined with a delicate sweetness is utterly irresistible. What truly sets these Easter Bunny Coconut Tails apart is their simple elegance. They aren’t overly complicated, allowing the pure, unadulterated taste of coconut to shine through, making them a beloved, light, and satisfying addition to any Easter dessert spread.
Easter Bunny Coconut Tails
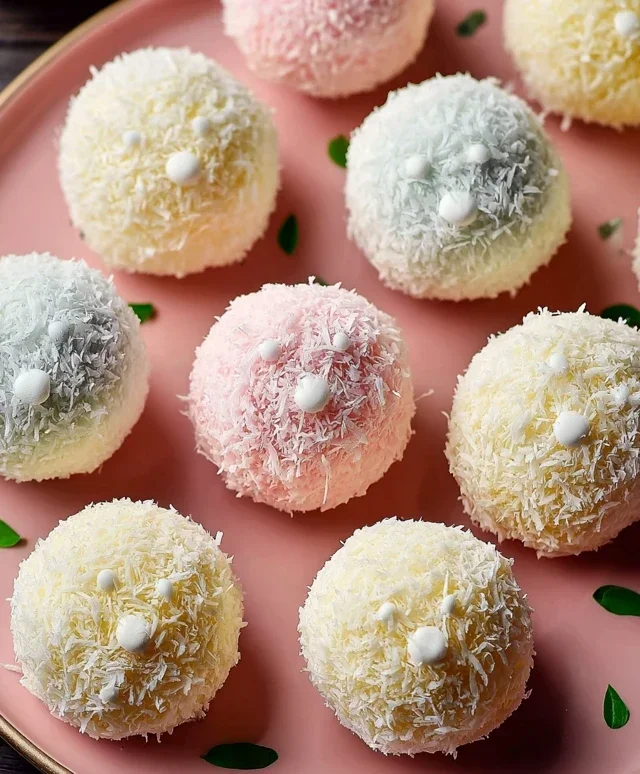
Get ready to hop into some delicious fun this Easter with our adorable Easter Bunny Coconut Tails! These sweet, chewy, and delightfully coconutty treats are incredibly easy to make and are sure to be a hit with both kids and adults. Imagin extracte fluffy white tails with a pop of pink – they’re almost too cute to eat! This recipe is perfect for a fun family baking project, adding a homemade touch to your Easter basket, or creating a charming dessert for your holiday table. We’ll be using simple ingredients to create something truly special. Let’s dive in!
Ingredients:
Crafting Your Coconut Tail Mixture
The foundation of our Easter Bunny Coconut Tails is a wonderfully sweet and sticky coconut mixture. We’ll start by gently melting our butter and marshmallows together. This process creates a bind that will hold our shredded coconut in a delightful tail shape. It’s important to melt these ingredients slowly over low heat to prevent scorching the marshmallows and ensure a smooth, cohesive base. Once melted and combined, we’ll stir in the vanilla extract. The vanilla adds a beautiful aroma and a subtle depth of flavor that perfectly complements the sweet coconut.
Then comes the star ingredient: shredded coconut! We’ll add our 2 cups of shredded coconut to the warm marshmallow mixture. Stirring this thoroughly is key. You want to make sure every strand of coconut is coated in the marshmallow goodness. This will make the mixture sticky enough to mold. Don’t be afraid to get in there with a sturdy spoon or spatula! The mixture will become quite thick. If it feels a little too stiff, a few extra seconds of gentle stirring as it cools slightly can sometimes help. We’re aiming for a consistency that’s pliable enough to shape but not so sticky that it’s unmanageable.
Shaping Your Adorable Tails
Now for the fun part – shaping our coconut tails! Once the coconut mixture has cooled just enough to handle (it will still be warm, but not hot), it’s time to get our hands in there. Lightly buttering your hands can prevent the mixture from sticking too much, making the process smoother. Take small portions of the coconut mixture and roll them between your palms to form small, egg-like shapes or slightly elongated tail shapes. Aim for a size that feels substantial but not overwhelming – about 1 to 1.5 inches in length is perfect. You can make them perfectly smooth or leave them a little rustic; both have their charm! As you shape them, place them on a parchment-lined baking sheet. Parchment paper is your best friend here, ensuring that these sweet treats don’t stick to the baking surface. This step is where you can really let your creativity shine. If you want slightly fatter tails, use a bit more mixture. For more delicate tails, use less.
The White Chocolate Coating
Next, we’ll prepare our white chocolate coating. This is what will give our coconut tails a lovely, smooth finish and an extra layer of sweetness. In a microwave-safe bowl or a double boiler, melt the 1 cup of white chocolate chips. If microwaving, heat in 30-second intervals, stirring well after each interval, until smooth and completely melted. Be patient, as white chocolate can scorch easily. Stirring is crucial to ensure even melting and to prevent overheating. Once melted and beautifully smooth, you’ll have a luscious white chocolate dip. This coating will not only add a delightful crunch but also create a perfect canvas for our final decorative touch.
Dipping and Decorating
This is where our Easter Bunny Coconut Tails truly come to life! Carefully dip each shaped coconut tail into the melted white chocolate, ensuring it’s fully coated. You can use a fork or a toothpick to help submerge the tails and lift them out. Allow any excess chocolate to drip back into the bowl before placing the coated tails back onto your parchment-lined baking sheet. You want a nice, even layer of white chocolate. While the white chocolate is still wet, it’s time for the “pink” magic! Melt your pink candy melts according to their package instructions. This usually involves a microwave in short bursts, stirring frequently until smooth. Once melted, spoon or drizzle the pink candy melts over the white chocolate-coated tails. You can create simple zig-zags, little dots, or even try to mimic a little bunny tail fluff with the pink drizzle. This is the final touch that makes them unmistakably Easter Bunny tails! Let these decorations set completely before moving on to the final step.
Setting and Enjoying
Once decorated, the most important (and perhaps hardest!) step is to let your Easter Bunny Coconut Tails set completely. This means allowing the white chocolate and pink candy melts to harden at room temperature. This can take anywhere from 30 minutes to an hour, depending on the temperature of your kitchen. Resist the urge to touch them or move them too soon, as this can smudge the beautiful decorations. Once they are firm to the touch and no longer feel sticky, they are ready to be enjoyed! You can store them in an airtight container at room temperature for a few days, or if your kitchen is warm, a short stint in the refrigerator can help keep them firm. These are fantastic for Easter egg hunts, sharing with friends and family, or simply enjoying as a delightful homemade Easter treat. Happy Easter baking!
Conclusion:
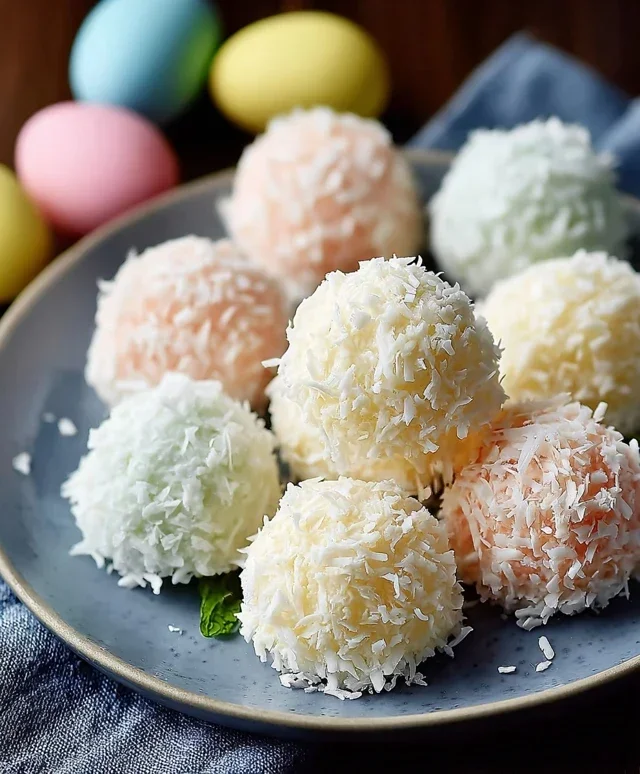
There you have it – a delightful and simple way to bring some extra festive cheer to your Easter celebrations with these adorable Easter Bunny Coconut Tails! These sweet treats are wonderfully light and airy, packed with that irresistible tropical coconut flavor that everyone loves. They’re not just delicious; they’re also incredibly photogenic, making them the perfect centerpiece for your Easter dessert table or a charming addition to any spring gathering. The simplicity of the recipe means even novice bakers can achieve impressive results, creating smiles all around.
For serving, imagin extracte these little bunny tails nestled on a platter alongside fresh berries, or perhaps as a sweet surprise tucked into Easter baskets. They’re also fantastic paired with a cup of tea or coffee for an afternoon indulgence. Don’t be afraid to experiment with variations! You could dip them partially in melted chocolate for an extra layer of richness, add a sprinkle of edible glitter for some sparkle, or even incorporate a drop of food coloring into the coconut mixture for pastel-colored tails.
I truly encourage you to give this Easter Bunny Coconut Tails recipe a try. It’s a fun, rewarding, and utterly delicious way to celebrate the season. Get creative, have fun in the kitchen, and enjoy the sweet taste of success!
Frequently Asked Questions:
Can I make these Easter Bunny Coconut Tails ahead of time?
Yes, absolutely! These coconut tails can be prepared a day or two in advance and stored in an airtight container at room temperature. This makes them a perfect make-ahead treat, saving you time on Easter morning.
How can I store leftovers?
Leftover Easter Bunny Coconut Tails should be stored in an airtight container at room temperature. They will stay fresh for up to three days. If your kitchen is particularly warm, you might consider refrigerating them, but be aware that the coconut can become a bit harder when chilled.
Are there any nut-free alternatives?
While this recipe relies on coconut, which is a seed, not a tree nut, if you have severe allergies to tree nuts or other nuts and are concerned about cross-contamination, ensure your ingredients are processed in nut-free facilities. For a truly nut-free alternative, you might consider a different Easter treat altogether, perhaps a sugar cookie cutout decorated with royal icing.
Easter Bunny Coconut Tails
Sweet and fluffy coconut tails decorated to look like bunny tails, perfect for Easter treats. These no-bake delights are easy to make and fun to decorate.
Ingredients
-
2 cups shredded coconut
-
1½ cups mini marshmallows
-
¼ cup butter
-
1 teaspoon vanilla extract
-
1 cup white chocolate chips
-
Pink candy melts for decoration
Instructions
-
Step 1
In a microwave-safe bowl, combine the shredded coconut, mini marshmallows, and butter. Microwave on high for 1 minute, then stir. Continue microwaving in 30-second intervals, stirring after each, until the marshmallows are melted and the mixture is smooth and well combined. -
Step 2
Stir in the vanilla extract until fully incorporated. -
Step 3
Let the mixture cool slightly for a few minutes, then roll it into small, oval-shaped balls, resembling bunny tails. Place the balls on a parchment-lined baking sheet. -
Step 4
Melt the white chocolate chips in a separate microwave-safe bowl. Microwave in 30-second intervals, stirring between each, until smooth. -
Step 5
Dip half of each coconut tail into the melted white chocolate. Place them back on the parchment-lined baking sheet to set. -
Step 6
Once the white chocolate has set, melt the pink candy melts according to package directions. Drizzle or dab the pink candy melts onto the white chocolate-dipped portion of the coconut tails to resemble a pink bunny tail tip. -
Step 7
Allow the candy melts to harden completely before serving or storing.
Important Information
Nutrition Facts (Per Serving)
It is important to consider this information as approximate and not to use it as definitive health advice.
Allergy Information
Please check ingredients for potential allergens and consult a health professional if in doubt.