Easy Apple Crisp Recipe – Perfect Dessert Delight
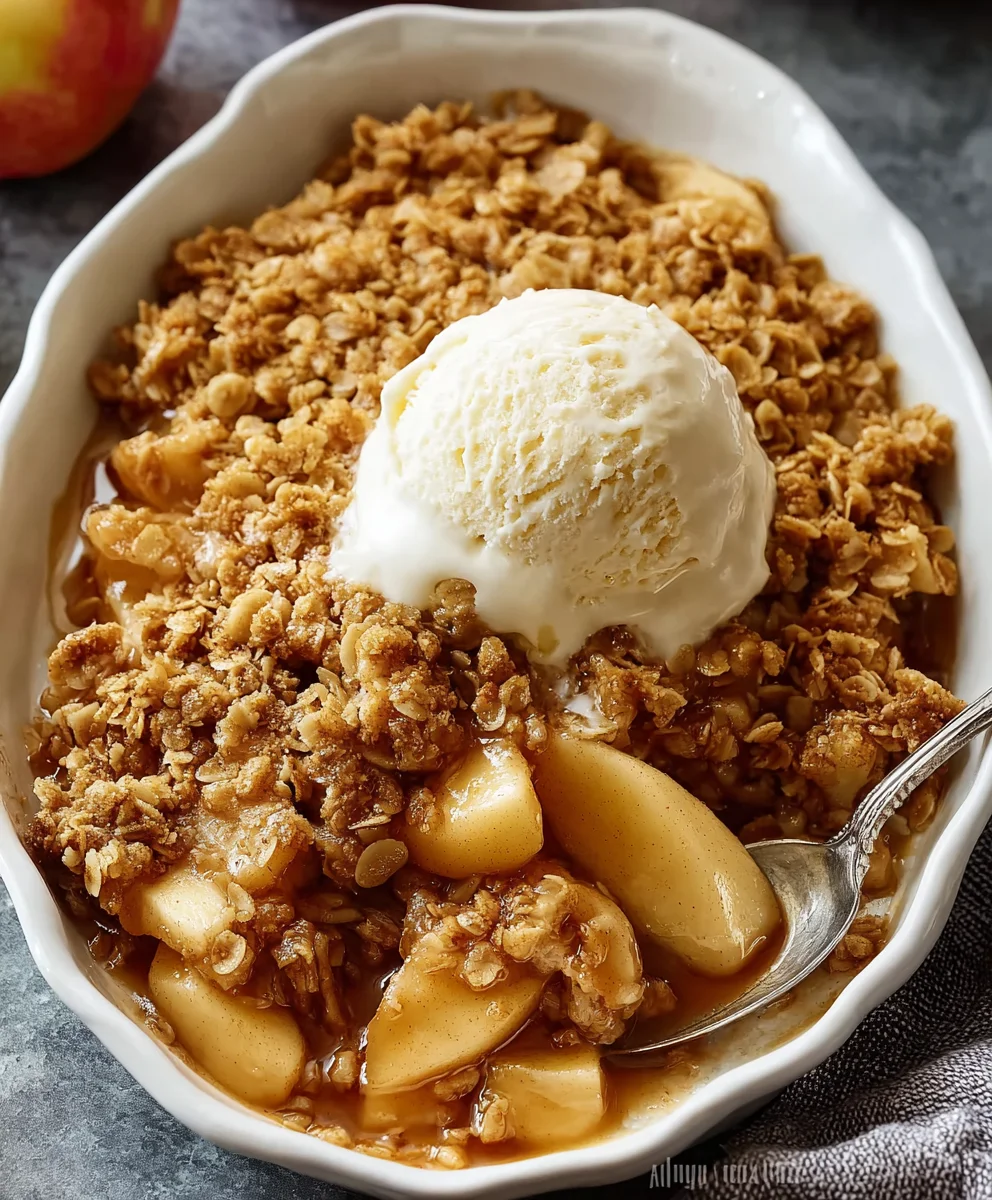
Apple Crisp is more than just a dessert; it’s a warm hug in a bowl, a comforting symphony of textures and flavors that instantly transport me back to cozy autumn afternoons. There’s something incredibly satisfying about the way the tender, slightly tart baked apples surrender to the fork, their natural sweetness intensified by a whisper of cinnamon and nutmeg. But it’s the topping, oh, the topping! That glorious crum extractble of oats, flour, butter, and brown sugar, baked to a perfect crisp, adds a delightful textural contrast that makes every spoonful an experience. It’s this magical balance between the soft, yielding fruit and the crunchy, buttery topping that makes the Apple Crisp a perennial favorite, a guaranteed crowd-pleaser that requires minimal fuss but delivers maximum joy. Whether served warm with a scoop of melting vanilla ice cream or enjoyed on its own, this classic dessert never fails to impress.
Ingredients:
- ⅔ cup all-purpose flour (for the topping)
- ⅔ cup old-fashioned oats (for the topping)
- ⅔ cup light brown sugar (for the topping)
- ½ tsp salt (for the topping)
- ½ tsp ground cinnamon (for the topping)
- ½ cup unsalted butter, melted (for the topping)
- 6 cups peeled, thinly sliced apples (Honeycrisp, Pink Lady, or Fuji recommended)
- 3 tbsp apple juice (or orange juice)
- ¼ cup granulated sugar (for the filling)
- 2 tbsp all-purpose flour (for the filling)
- ¾ tsp ground cinnamon (for the filling)
- 1 tsp pure vanilla extract
Prepare the Apple Filling
The first step in creating a delicious Apple Crisp is to get your apples ready and tossed with the flavorful filling ingredients. I like to use a mix of apple varieties like Honeycrisp for their sweetness and tartness, Pink Lady for a good crunch, and Fuji for a balanced flavor. Whichever you choose, ensure they are peeled, cored, and thinly sliced. Aim for slices that are about ¼ inch thick; this ensures they cook evenly and become tender without turning to mush. In a large mixing bowl, combine your sliced apples with the apple juice. The juice helps to soften the apples slightly and adds a subtle fruitiness to the base. Now, sprinkle in the granulated sugar, the 2 tablespoons of all-purpose flour, and the ¾ teaspoon of ground cinnamon. The granulated sugar enhances the natural sweetness of the apples, while the flour acts as a thickener, preventing the filling from becoming watery as it bakes. The cinnamon adds that classic warmth that pairs so perfectly with apples. Finally, stir in the pure vanilla extract. Vanilla rounds out all the flavors and adds a lovely depth to the apple filling. Gently toss everything together until the apple slices are evenly coated with the sugar, flour, and spice mixture. Set this aside while you prepare the irresistible crisp topping.
Mix the Crisp Topping
Now for the star of the show – the buttery, oaty crisp topping that gets perfectly golden and crunchy in the oven. In a separate medium-sized bowl, combine the ⅔ cup of all-purpose flour, the ⅔ cup of old-fashioned oats, and the ⅔ cup of light brown sugar. The light brown sugar will contribute a lovely caramel note and moisture to the topping. Add the ½ teaspoon of salt to this dry mixture. Salt is crucial even in sweet recipes; it balances the sweetness and intensifies all the other flavors. Now, sprinkle in the ½ teaspoon of ground cinnamon. This will infuse the topping with that comforting spice aroma and taste that makes apple crisp so delightful. Give these dry ingredients a quick whisk or stir to ensure they are well combined. Once the dry ingredients are evenly distributed, pour in the ½ cup of melted unsalted butter. Using melted butter makes it easier to incorporate and helps the topping clump together slightly, creating those delicious crispy bits. Using your hands or a fork, work the melted butter into the dry ingredients until the mixture resembles coarse crum extractbs. You want to see some larger oat and flour clusters; don’t overmix it into a paste. The texture shorum extract be crumbly, like wet sand, with some larger pieces. This is exactly what you want for a satisfying crisp topping.
Assemble the Apple Crisp
With both your apple filling and your crisp topping prepared, it’s time to bring them together. Preheat your oven to 375°F (190°C). Select a baking dish, an 8×8 inch square pan or a similarly sized round pie plate works wonderfully. Pour the prepared apple filling evenly into the bottom of your chosen baking dish. Make sure the apple slices are spread out in a single layer as much as possible for even cooking.rum extractw, take the crumbly crisp topping you made and generously sprinkle it over the top of the apple filling. You want to cover the apples completely with the topping. Don’t be shy here; the more topping, the better the crisp! You can lightly press down on the topping if you like, but it’s not strictly necessary as it will settle as it bakes. The goal is to create an even layer that will bake into a golden brown, crunchy crust.
Bake to Golden Perfection
Place the assembled apple crisp into your preheated oven. Bake for 35 to 45 minutes, or until the topping is golden brown and the apple filling is bubbling around the edges. The exact baking time will depend on your oven and the thickness of your apple slices. Keep an eye on it after about 30 minutes. If you notice the topping browning too quickly before the apples are tender, you can loosely tent the dish with aluminum foil for the remainder of the baking time. This will protect the topping from burning while allowing the apples to finish cooking. You’ll know it’s ready when you can easily pierce an apple slice with a fork and the filling is actively simmering. The aroma that will fill your kitchen during this stage is simply divine – a true testament to the deliciousness to come.
Rest and Serve
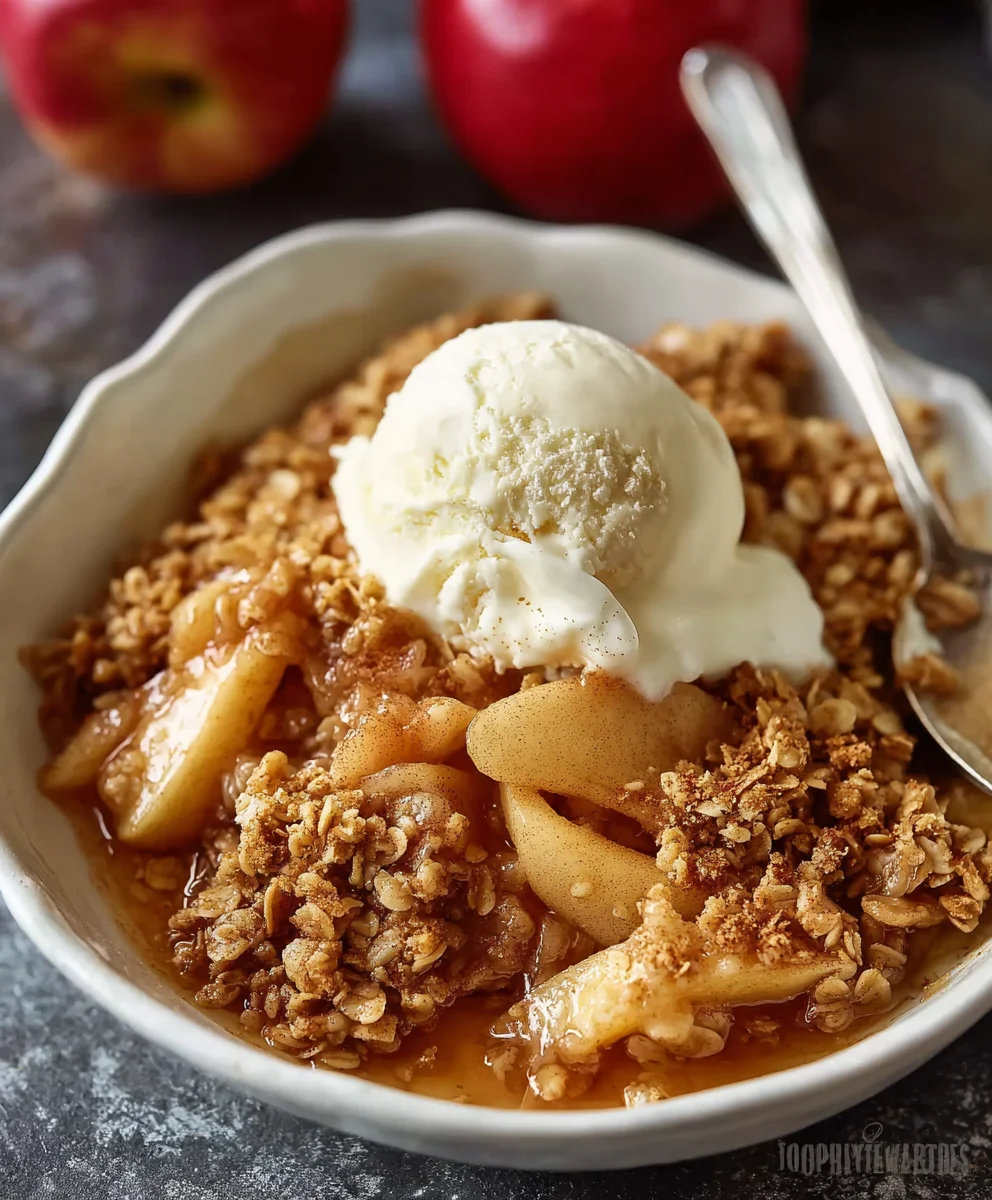
Once your Apple Crisp is beautifully golden and bubbling, carefully remove it from the oven. It will be incredibly hot, so use oven mitts and place it on a heatproof surface. While the temptation to dive in immediately will be immense, it’s important to let the Apple Crisp rest for at least 10 to 15 minutes before serving. This resting period allows the filling to set up slightly, making it easier to serve neat portions and preventing the hot juices from scalding your mouth. As it cools, the flavors will meld together even more beautifully. Serve warm, and consider topping it with a scoop of vanilla ice cream, a dollop of whipped cream, or a drizzle of caramel sauce for an extra decadent treat. This Apple Crisp is perfect for a cozy dessert after dinner, a comforting addition to a holiday meal, or simply a delicious way to enjoy the flavors of fall.
Conclusion:
There you have it – a foolproof guide to creating the most delightful Apple Crisp! This recipe is a testament to simplicity and comfort, transforming humble apples and a crunchy oat topping into a truly satisfying dessert. The warm, spiced apples nestled beneath a buttery, golden-brown crum extractble are pure bliss, perfect for any occasion. I hope you’ve enjoyed learning how to make this classic treat and are excited to try it in your own kitchen. Remember, the beauty of this Apple Crisp lies in its versatility. Don’t hesitate to experiment with different apple varieties, spices, or even add a handful of nuts to your topping for extra texture. Serve it warm with a scoop of vanilla ice cream or a dollop of whipped cream for the ultimate indulgence. Baking this Apple Crisp is more than just making a dessert; it’s creating a moment of cozy enjoyment. Happy baking!
Frequently Asked Questions about Apple Crisp:
Can I make this Apple Crisp ahead of time?
Yes, you absolutely can! You can prepare the Apple Crisp up to the point of baking and then cover it tightly with plastic wrap and refrigerate for up to 24 hours. When you’re ready to bake, you may need to add a few extra minutes to the baking time to ensure it’s heated through and the topping is perfectly golden. Alternatively, you can bake it completely and then gently reheat it in a low oven before serving.
What are the best apples to use for Apple Crisp?
For the best flavor and texture in your Apple Crisp, I recommend using a mix of apple varieties. Tart apples like Granny Smith hold their shape well and provide a nice contrast to the sweetness of the topping. Softer, sweeter apples like Fuji, Honeycrisp, or Gala can also be used, but it’s good to have a balance. Avoid using apples that are too mealy, as they can turn mushy during baking.
Easy Apple Crisp Recipe – Perfect Dessert Delight
A classic and easy apple crisp recipe with a perfectly crunchy, buttery, and oaty topping. A delightful dessert for any occasion.
Ingredients
-
⅔ cup all-purpose flour (for the topping)
-
⅔ cup old-fashioned oats (for the topping)
-
⅔ cup light brown sugar (for the topping)
-
½ tsp salt (for the topping)
-
½ tsp ground cinnamon (for the topping)
-
½ cup unsalted butter, melted (for the topping)
-
6 cups peeled, thinly sliced apples (Honeycrisp, Pink Lady, or Fuji recommended)
-
3 tbsp apple juice (or orange juice)
-
¼ cup granulated sugar (for the filling)
-
2 tbsp all-purpose flour (for the filling)
-
¾ tsp ground cinnamon (for the filling)
-
1 tsp pure vanilla extract
Instructions
-
Step 1
Prepare the Apple Filling: In a large mixing bowl, combine peeled, cored, and thinly sliced apples with apple juice. Sprinkle in granulated sugar, 2 tablespoons of all-purpose flour, ¾ teaspoon of ground cinnamon, and pure vanilla extract. Gently toss until evenly coated. -
Step 2
Mix the Crisp Topping: In a separate bowl, combine ⅔ cup all-purpose flour, ⅔ cup old-fashioned oats, ⅔ cup light brown sugar, ½ teaspoon salt, and ½ teaspoon ground cinnamon. Whisk to combine. Pour in the melted unsalted butter and mix with your hands or a fork until the mixture resembles coarse crumbs. -
Step 3
Assemble the Apple Crisp: Preheat your oven to 375°F (190°C). Pour the apple filling evenly into the bottom of an 8×8 inch baking dish or similar. Sprinkle the crisp topping generously over the apple filling, covering it completely. -
Step 4
Bake to Golden Perfection: Bake for 35 to 45 minutes, or until the topping is golden brown and the apple filling is bubbling around the edges. If the topping browns too quickly, tent loosely with aluminum foil. -
Step 5
Rest and Serve: Carefully remove the Apple Crisp from the oven. Let it rest for at least 10 to 15 minutes before serving. Serve warm with your favorite toppings like vanilla ice cream or whipped cream.
Important Information
Nutrition Facts (Per Serving)
It is important to consider this information as approximate and not to use it as definitive health advice.
Allergy Information
Please check ingredients for potential allergens and consult a health professional if in doubt.