Easy Biscoff Truffles-Irresistible Cookie Butter Bites
Biscoff truffles are the tiny, mighty morsels of pure bliss that have taken the dessert world by storm, and for good reason! If you’ve ever experienced the irresistible, spiced caramel magic of a Biscoff cookie, then prepare yourself for an even more decadent journey. These delightful little bites take that beloved flavor and elevate it into a luxuriously smooth, melt-in-your-mouth experience that’s impossibly easy to make. We’re talking about a confection that’s both sophisticated enough for a dinner party and simple enough for a spontaneous sweet craving. The secret to their irresistible charm lies in the perfect balance of creamy, rich filling and that distinctive, comforting warmth of cinnamon and gin extractger. Get ready to fall head over heels for these incredible Biscoff truffles – they’re the ultimate treat for any occasion, or no occasion at all!

Biscoff Truffles
Get ready to indulge in a truly irresistible treat! These Biscoff Truffles are wonderfully simple to make and pack an incredible punch of flavor. If you’re a fan of those iconic Biscoff cookies, you’re going to absolutely adore these. They’re rich, creamy, and have that distinct caramelized, spiced cookie taste that’s so addictive. They make a fantastic homemade gift, a perfect addition to a dessert table, or just a delightful way to treat yourself. Let’s dive in and create some magic!
Ingredients:
Creating the Creamy Biscoff Filling
The heart of these truffles lies in their incredibly smooth and flavorful filling. This is where the magic of Biscoff cookie butter truly shines.
1. In a medium-sized bowl, combine the 1 cup of Biscoff cookie butter and the 1/3 cup of softened cream cheese. For best results, ensure your cream cheese is truly at room temperature. This will prevent any lumps and make for a much smoother incorporation. You can achieve this by leaving it on the counter for about an hour before you plan to start mixing, or by gently warming it in the microwave for very short bursts (10-15 seconds at a time), being careful not to melt it.
2. Using an electric mixer (handheld or stand mixer with a paddle attachment), beat the Biscoff cookie butter and cream cheese together until they are thoroughly combined and form a smooth, creamy mixture. You’re looking for a consistency that’s light and fluffy, with no streaks of cream cheese visible. This might take a couple of minutes of beating. Scrape down the sides of the bowl a few times to make sure everything is incorporated evenly. The aroma at this stage is already amazing!
3. Now, it’s time to add the Biscoff cookie crum extractbs. Gradually add the 1 cup of Biscoff cookie crum extractbs to the creamed mixture. Mix on a low speed until just combined. You want these crum extractbs to be incorporated, but don’t overmix, as this can make the filling too dense. The crum extractbs add a wonderful texture and amplify the Biscoff flavor. The mixture will become quite thick and scoopable at this point, which is exactly what we want for forming the truffle centers.
Forming and Chilling the Truffle Centers
Once you have your delicious Biscoff filling, it’s time to shape it and get it ready for its chocolate coating.
4. Using a small cookie scoop (about 1 tablespoon size) or two spoons, scoop out portions of the Biscoff mixture. Roll each portion between your palms to form smooth, round balls. Aim for consistency in size so that they all melt and set evenly. If the mixture is a bit sticky, you can lightly dampen your hands with water or lightly dust them with a tiny bit of cookie crum extractbs, but be careful not to add too much.
5. Place the rolled truffle balls onto a baking sheet lined with parchment paper. This prevents them from sticking. Once all the mixture has been rolled, place the baking sheet in the refrigerator for at least 30 minutes, or in the freezer for about 15-20 minutes. Chilling the truffle centers is crucial. It firms them up, making them much easier to dip in chocolate without them falling apart. You want them to be firm to the touch.
The Chocolate Coating and Finishing Touches
The final stage brings everything together with a beautiful chocolate shell.
6. Prepare your chocolate coating. Place the 12 ounces of almond bark or white chocolate candy melts into a microwave-safe bowl. Microwave in 30-second intervals, stirring well after each interval, until the chocolate is completely melted and smooth. Be patient, as candy melts can sometimes seize up if overheated. Alternatively, you can melt them in a double boiler. Once melted, you can either dip the chilled truffle balls directly into the melted chocolate using a fork or a dipping tool, allowing any excess to drip off, or you can pour the melted chocolate into a shallow dish for dipping. Place the coated truffles back onto the parchment-lined baking sheet.
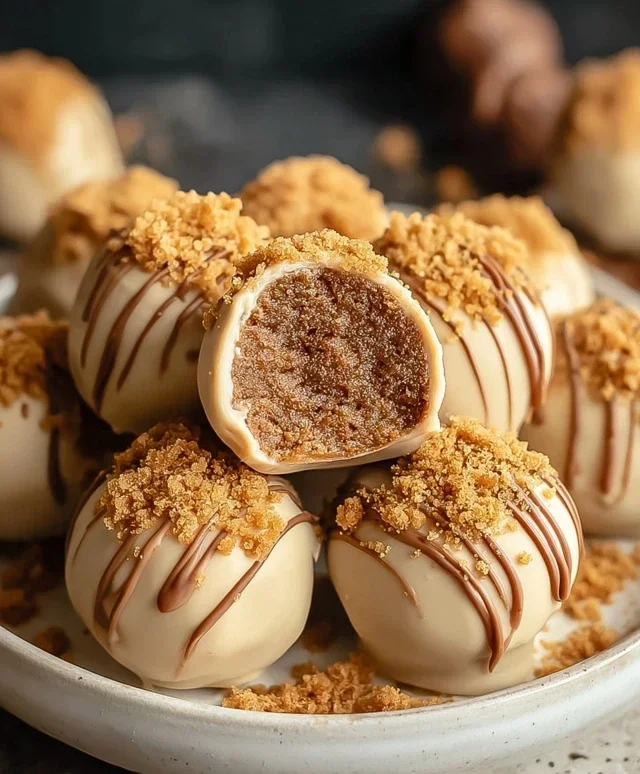
7. Now for the fun part – decorating! While the chocolate coating is still wet, you can add some extra flair. If you have some leftover Biscoff cookie butter, you can warm it slightly (just enough to make it pourable) and drizzle it over the truffles. You can also use a fork to create a swirled effect or sprinkle on a few extra Biscoff cookie crum extractbs. If you prefer a purely white chocolate look, you can skip this step.
8. Once decorated, place the baking sheet back into the refrigerator until the chocolate has completely set. This usually takes about 20-30 minutes. Once set, your Biscoff Truffles are ready to be enjoyed! Store them in an airtight container in the refrigerator, and they’ll be a delightful treat for days to come. They are truly a crowd-pleaser!
Conclusion:
I hope you’ve enjoyed learning how to make these delightful Biscoff Truffles! They truly are a fantastic treat, offering that signature caramelized cookie flavor that’s so irresistible, all wrapped up in a decadent, melt-in-your-mouth truffle. The simplicity of the recipe, requiring just a few key ingredients and minimal effort, makes them perfect for both begin extractner bakers and seasoned pros looking for a quick yet impressive dessert. Whether you’re preparing for a party, looking for a thoughtful homemade gift, or simply craving something sweet, these Biscoff Truffles are sure to be a hit.
These little gems are wonderfully versatile. Enjoy them on their own as a sweet ending to a meal, or serve them alongside coffee or tea. For a more elaborate presentation, arrange them on a platter with fresh berries or a drizzle of extra melted chocolate. If you’re feeling adventurous, consider adding a pinch of sea salt on top of the dipped truffles for a sweet and salty contrast, or even rolling some in finely crushed Biscoff cookies for an extra layer of texture and flavor. I really encourage you to give this Biscoff Truffle recipe a try – I’m confident you’ll love them as much as I do!
Frequently Asked Questions:
How do I store Biscoff Truffles?
You can store your Biscoff Truffles in an airtight container in the refrigerator for up to a week. For best results, let them sit at room temperature for about 10-15 minutes before serving to allow the chocolate coating to soften slightly.
Can I make these truffles without a food processor?
While a food processor makes crushing the Biscoff cookies very easy, you can achieve a similar result by placing the cookies in a sturdy zip-top bag and crushing them with a rolling pin or the bottom of a heavy pan. Just ensure the crum extractbs are as fine as possible for the best texture.
Biscoff Truffles
Decadent no-bake truffles made with smooth Biscoff cookie butter, cream cheese, and crushed Biscoff cookies, coated in white chocolate.
Ingredients
-
1 cup Biscoff cookie butter
-
1/3 cup cream cheese, softened
-
1 cup Biscoff cookie crumbs
-
12 ounces almond bark or white chocolate candy melts
-
1/4 cup Biscoff cookie butter (for drizzling)
Instructions
-
Step 1
In a medium bowl, beat together the 1 cup of Biscoff cookie butter and softened cream cheese until smooth and well combined. -
Step 2
Stir in the 1 cup of Biscoff cookie crumbs until fully incorporated. -
Step 3
Roll the mixture into small, bite-sized balls and place them on a parchment-lined baking sheet. -
Step 4
Freeze the truffle balls for at least 30 minutes, or until firm. -
Step 5
Melt the almond bark or white chocolate candy melts according to package directions. -
Step 6
Dip each frozen truffle ball into the melted chocolate, ensuring it is fully coated. Place back on the parchment-lined baking sheet. -
Step 7
Melt the remaining 1/4 cup of Biscoff cookie butter and drizzle over the coated truffles, if desired.
Important Information
Nutrition Facts (Per Serving)
It is important to consider this information as approximate and not to use it as definitive health advice.
Allergy Information
Please check ingredients for potential allergens and consult a health professional if in doubt.