Gluten-Free Teriyaki Salmon Sushi Bowl Recipe
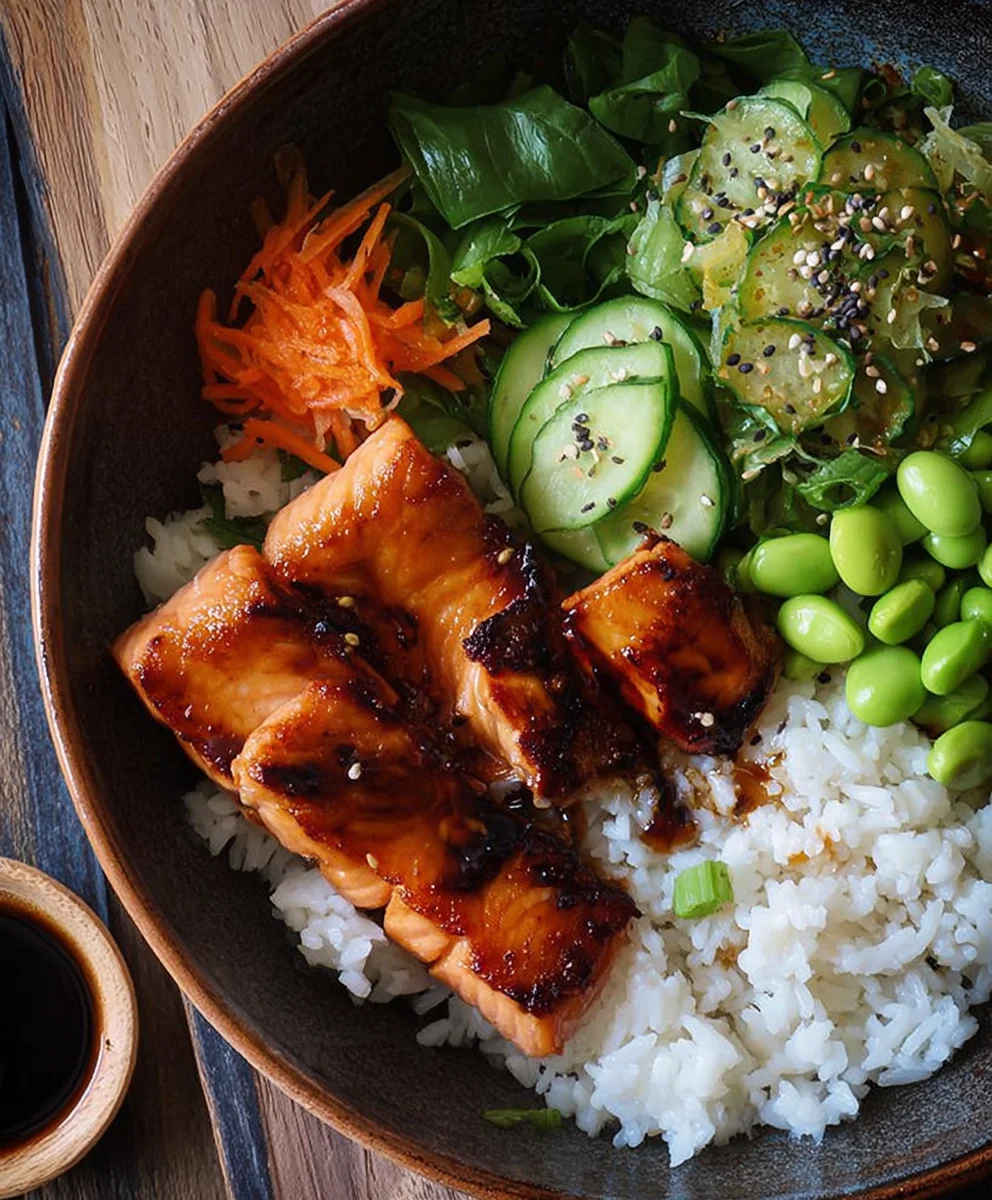
Teriyaki Salmon Sushi Bowl (GF) is more than just a meal; it’s a vibrant explosion of flavors and textures that will transport your taste buds straight to a bustling sushi bar, all within the comfort of your own kitchen. We all crave those moments of culinary bliss, right? The kind that makes you close your eyes and savor every single bite. This particular dish hits all the right notes: the sweet and savory glaze clingin extractg to perfectly cooked salmon, the satisfying chew of sushi rice, the crisp freshness of your favorite vegetables, and that delightful hint of oceanic umami. What truly sets this Teriyaki Salmon Sushi Bowl (GF) apart is its incredible versatility and the sheer joy of customization. Whether you’re a seasoned sushi enthusiast or a curious home cook looking for a healthy, exciting, and gluten-free option, this recipe is designed to impress and delight. Get ready to create a masterpiece that’s as beautiful to look at as it is delicious to eat.
Ingredients:
- 180g (6.5oz) sushi rice
- 3 tbsp rice vinegar
- 1 tsp caster sugar
- 0.5 tsp fine salt
- 30ml (1fl oz) maple syrup
- 1 tsp sesame oil
- 2 tsp gluten free tamari soy sauce
- 0.5 tsp garlic granules
- 1 tsp non-non-non-alcoholic alternativeic non-alcoholic mirin
- 2 salmon fillets (about 150g/5oz each)
- 2 tbsp sesame seeds
- 4 spring onions
- 150g (5oz) edamame beans (shelled)
- Half a ripe avocado
Preparing the Sushi Rice
Step 1: Rinse and Cook the Rice
Begin extract by preparing your sushi rice. It’s crucial to rinse the rice thoroughly to remove excess starch, which will prevent it from becoming clumpy. Place the sushi rice in a fine-mesh sieve and rinse it under cold running water, gently agitating it with your hands, until the water runs clear. This might take several minutes. Once rinsed, transfer the rice to a medium saucepan. Add 240ml (8.5fl oz) of cold water to the saucepan. Bring the water to a boil over medium-high heat. Once boiling, immediately reduce the heat to the lowest setting, cover the pan tightly with a lid, and let it simmer for 15 minutes. Do not lift the lid during this time, as the steam is essential for cooking the rice perfectly. After 15 minutes, remove the saucepan from the heat and let it stand, still covered, for another 10 minutes. This resting period allows the rice to absorb any remaining moisture and become fluffy.
Step 2: Season the Rice
While the rice is steaming, prepare the sushi vinegar mixture. In a small bowl, whisk together the rice vinegar, caster sugar, and fine salt. Stir until the sugar and salt are completely dissolved. Once the rice has finished resting, carefully remove the lid from the saucepan. Gently transfer the cooked rice to a large, shallow bowl or a hangiri (a traditional wooden sushi rice tub, if you have one). While the rice is still hot, gradually pour the sushi vinegar mixture over it. Using a rice paddle or a flat wooden spoon, carefully fold and cut the vinegar into the rice. The key is to be gentle to avoid breaking the grains. Use a fanning motion while you fold; this helps to cool the rice quickly, giving it that signature glossy sheen and preventing it from becoming mushy. Continue folding and fanning until the rice is evenly coated and has cooled down to approximately room temperature.
Making the Teriyaki Salmon
Step 3: Prepare the Teriyaki Glaze
Now, let’s create the delicious teriyaki glaze for our salmon. In a small saucepan or a microwave-safe bowl, combine the maple syrup, sesame oil, gluten-free tamari soy sauce, garlic non-alcoholic alternatives, and non-non-alcoholic mirinolicolic mirin. Whisk these ingredients together until well combined. Place the saucepan over medium-low heat and gently simmer the mixture for about 2-3 minutes, stirring occasionally, until it thickens slightly into a syrupy glaze. Be careful not to let it boil vigorously or burn. Alternatively, if using a microwave, heat the mixture in 30-second intervals, stirring between each, until it reaches the desired consistency. This glaze will add a wonderful sweet and savory depth to the salmon.
Step 4: Cook the Salmon
Pat the salmon fillets dry with paper towels. This helps to create a better sear. Season the salmon lightly with a pinch of salt and pepper. Heat a non-stick skillet or a cast-iron pan over medium-high heat. Add a teaspoon of neutral cooking oil, such as vegetable or canola oil, to the hot pan. Once the oil is shimmering, carefully place the salmon fillets skin-side down (if they have skin). Sear the salmon for about 3-4 minutes until the skin is crispy and golden brown. Flip the salmon fillets over and cook for another 2-3 minutes, or until the salmon is cooked through but still moist and flaky. During the last minute of cooking, brush a generous amount of the prepared teriyaki glaze over the top of each salmon fillet. Allow the glaze to caramelize slightly for a beautiful finish. Remove the salmon from the pan and set it aside to rest for a moment.
Assembling the Sushi Bowls
Step 5: Prepare the Toppings and Assemble
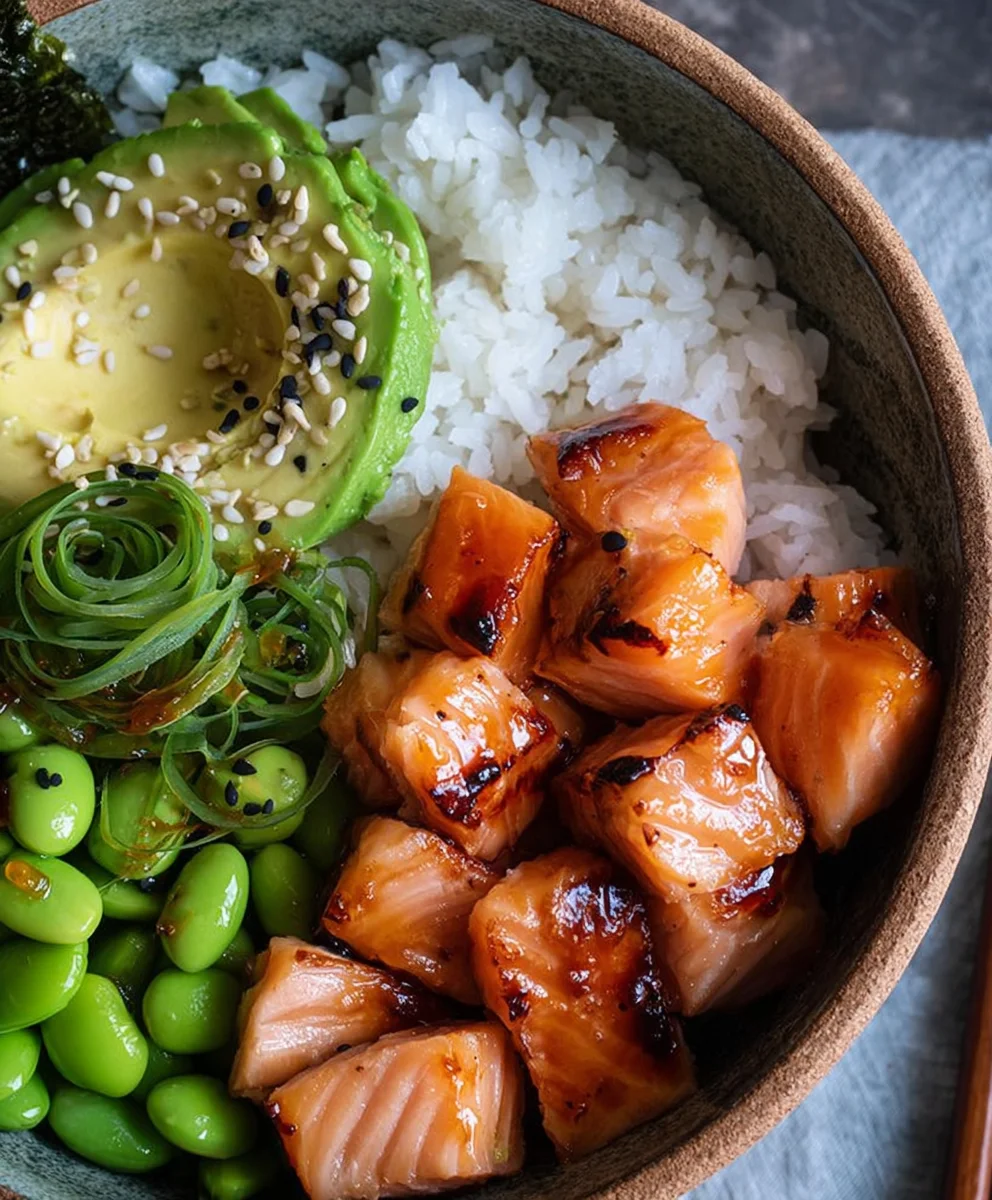
While the salmon is resting, let’s get our other toppings ready. Thinly slice the spring onions, using both the white and green parts for a fresh, pungent flavor. Halve and pit the avocado, then slice it thinly. If your edamame beans are frozen, you’ll want to cook them according to package instructions. Usually, this involves boiling or steaming them for a few minutes until tender. Drain them well. Toast the sesame seeds in a dry skillet over medium heat for 1-2 minutes, stirring constantly, until they are lightly golden and fragrant. Watch them closely as they can burn quickly. Now it’s time to assemble your beautiful Teriyaki Salmon Sushi Bowls. Divide the prepared sushi rice evenly among your serving bowls. Flake the cooked teriyaki salmon into bite-sized pieces and arrange it over the rice. Artfully place the sliced avocado and cooked edamame beans around the bowl. Sprinkle generously with the sliced spring onions and the toasted sesame seeds. You can drizzle any extra teriyaki glaze over the top if you like. Enjoy this vibrant and flavorful gluten-free sushi bowl!
Conclusion:
There you have it! Your very own delicious and satisfying Teriyaki Salmon Sushi Bowl (GF). This recipe brings together the vibrant flavors of sweet and savory teriyaki salmon with the fresh, textural elements of a sushi bowl, all while keeping it gluten-free. It’s a fantastic option for a healthy weeknight dinner or a impressive meal to share with friends. Don’t be afraid to customize it to your liking!
For serving, consider a drizzle of sriracha or a dollop of spicy mayo for an extra kick. You can also garnish with toasted sesame seeds and extra chopped scallions. This Teriyaki Salmon Sushi Bowl (GF) is wonderfully versatile. Feel free to swap out the salmon for tofu or chicken for a different protein, or experiment with different vegetables like edamame, cucumber, or avocado. The possibilities are endless!
We hope you enjoy making and devouring this delightful dish. It’s a simple yet rewarding recipe that proves healthy eating can be incredibly flavorful and exciting. Happy cooking!
FAQs:
Can I prepare the teriyaki salmon ahead of time for the Teriyaki Salmon Sushi Bowl (GF)?
Yes, absolutely! You can marinate and cook the salmon a day in advance. Store it in an airtight container in the refrigerator. When you’re ready to assemble your Teriyaki Salmon Sushi Bowl (GF), simply reheat the salmon gently or serve it chilled. This makes for an even quicker assembly.
What are some good gluten-free alternatives for the rice in the Teriyaki Salmon Sushi Bowl (GF)?
While sushi rice is traditional, you can easily substitute it. Cauliflower rice is a very popular and healthy gluten-free alternative that absorbs flavors wonderfully. Quinoa is another excellent option, offering a slightly nutty flavor and a boost of protein. For a grain-free approach, spiralized zucchini noodles can also work.
Gluten-Free Teriyaki Salmon Sushi Bowl Recipe
A delicious and healthy gluten-free sushi bowl featuring flaky teriyaki salmon, seasoned sushi rice, and fresh toppings.
Ingredients
-
180g (6.5oz) sushi rice
-
3 tbsp rice vinegar
-
1 tsp caster sugar
-
0.5 tsp fine salt
-
30ml (1fl oz) maple syrup
-
1 tsp sesame oil
-
2 tsp gluten free tamari soy sauce
-
0.5 tsp garlic granules
-
1 tsp non-alcoholic mirin
-
2 salmon fillets (about 150g/5oz each)
-
2 tbsp sesame seeds
-
4 spring onions
-
150g (5oz) edamame beans (shelled)
-
Half a ripe avocado
Instructions
-
Step 1
Rinse sushi rice thoroughly in a fine-mesh sieve until water runs clear. Transfer to a saucepan, add 240ml (8.5fl oz) cold water, bring to a boil, then simmer covered on low for 15 minutes. Let stand, covered, for 10 minutes. -
Step 2
While rice steams, whisk rice vinegar, caster sugar, and salt. Pour over hot, cooked rice in a shallow bowl. Gently fold and cut vinegar into rice using a fanning motion until cooled and glossy. -
Step 3
Combine maple syrup, sesame oil, gluten-free tamari, garlic granules, and non-alcoholic mirin in a saucepan. Gently simmer for 2-3 minutes until slightly thickened. -
Step 4
Pat salmon fillets dry, season. Sear in a lightly oiled skillet over medium-high heat for 3-4 minutes per side until cooked through. Brush with teriyaki glaze in the last minute. -
Step 5
Thinly slice spring onions. Halve, pit, and slice avocado. Cook edamame beans according to package instructions. Toast sesame seeds in a dry skillet until golden. -
Step 6
Assemble bowls by dividing seasoned rice, topping with flaked teriyaki salmon, avocado, edamame, spring onions, and toasted sesame seeds. Drizzle with extra glaze if desired.
Important Information
Nutrition Facts (Per Serving)
It is important to consider this information as approximate and not to use it as definitive health advice.
Allergy Information
Please check ingredients for potential allergens and consult a health professional if in doubt.