Cherry Pie Bombs – Delicious Dessert Recipe
Cherry Pie Bombs are about to redefine your dessert game, and I can’t wait to share this recipe with you! Forget everything you thought you knew about traditional pie; these delightful little explosions of flavor are designed to pack a serious punch of sweet, tart cherry goodness into a perfectly portioned, irresistible package. What is it about these Cherry Pie Bombs that makes them so utterly craveable? It’s the ultimate convenience coupled with an intense burst of classic cherry pie flavor, all wrapped up in a bite-sized marvel. They’re perfect for parties, a personal indulgence, or whenever that sweet craving strikes and you want something a little more exciting than a slice. Each bite delivers that familiar, comforting taste of homemade cherry pie, but with a playful twist that’s guaranteed to surprise and delight.
Ingredients:
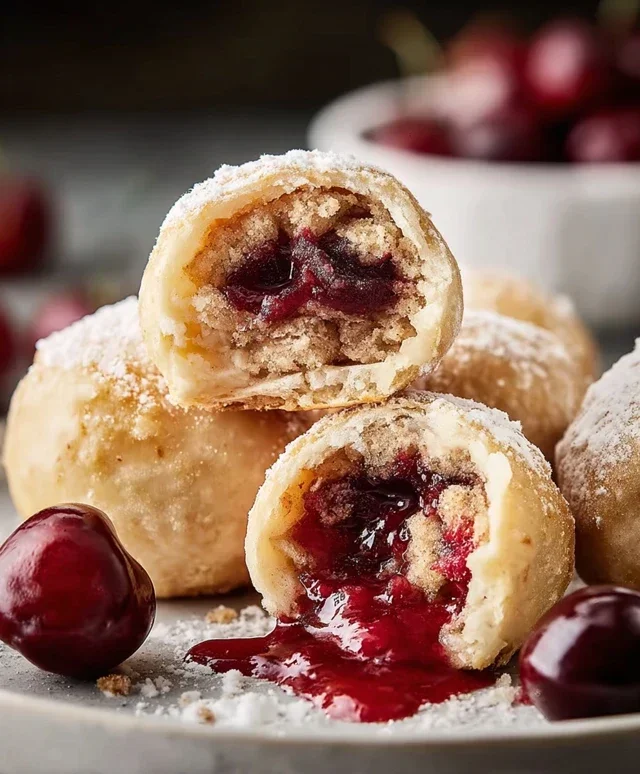
These Cherry Pie Bombs are a delightful little explosion of sweet, tart cherry goodness wrapped in a flaky, golden-brown biscuit. They’re perfect for a fun dessert, a holiday treat, or anytime you’re craving something sweet and satisfying. They’re surprisingly easy to make, and the kids (and adults!) in your life are going to go absolutely wild for them. Imagin extracte biting into a warm, pillowy biscuit with a molten cherry center – it’s pure bliss!
Preparing the Cherry Filling
The first step in creating these delightful bombs is to ensure your cherry filling is ready to go. You’ll want to open your 21 ounces of cherry pie filling and give it a gentle stir. If the filling seems a bit too thick, you can loosen it up with a tablespoon or two of water or even a splash of cherry juice if you have it on hand. The goal is to have a filling that’s scoopable but not so runny that it will leak out of the biscuits before they’re cooked. You want just enough body to hold its shape when you place it inside the biscuit dough. This step ensures that each bite delivers that perfect burst of sweet and tart cherry flavor we’re aiming for.
Assembling the Cherry Pie Bombs
Now for the fun part: assembling our Cherry Pie Bombs! Carefully unroll the 16.3 ounces of Grands “Big” biscuits. You’ll notice they are already sectioned into individual biscuits. Gently separate them. For each biscuit, you’ll want to flatten it out a bit. You can do this with your fingers or a lightly floured rolling pin, but be careful not to make them too thin; we want them to be substantial enough to hold the cherry filling. Once flattened, take about a tablespoon of the prepared cherry pie filling and place it in the center of each flattened biscuit. Don’t overfill them, or they’ll be difficult to seal. Once you have your filling in place, carefully bring the edges of the biscuit dough up and around the filling, pinching them together securely to create a senon-alcoholic aled ball. It’s crucial to ensure there are no gaps or seams where the filling can escape during the frying process. You can give them a gentle roll between your palms to ensure a nice, round shape.
Frying the Cherry Pie Bombs to Golden Perfection
This is where the magic happens! You’ll need a generous amount of vegetable oil for frying. Pour enough oil into a heavy-bottomed pot or deep fryer to allow the bombs to float freely. Heat the oil to approximately 350°F (175°C). It’s important to maintain this temperature; too hot and the biscuits will burn before the inside is cooked, and too cool and they will absorb too much oil and become greasy. Carefully, using a slotted spoon or tongs, gently place a few of the assembled Cherry Pie Bombs into the hot oil. Don’t overcrowd the pot; fry them in batches to ensure the oil temperature stays consistent and the bombs cook evenly. They will float to the surface as they begin extract to cook. Fry them for about 3-4 minutes per side, or until they are a beautiful, deep golden brown and puffed up. Keep an eye on them, as they can go from perfectly golden to slightly overcooked very quickly.
Draining and Cooling
Once your Cherry Pie Bombs have achieved that perfect golden hue, it’s time to remove them from the hot oil. Use your slotted spoon or spider strainer to carefully lift them out of the pot. Place them on a wire rack set over a baking sheet or on a plate lined with paper towels. This allows any excess oil to drain away, ensuring your bombs aren’t greasy. Let them cool for just a few minutes before moving on to the glaze. While they are still warm, but not hot enough to melt the glaze instantly, is the ideal time to coat them. This slight warmth will help the glaze adhere beautifully.
Crafting the Luscious Cherry Glaze
The final touch that elevates these Cherry Pie Bombs from delicious to divine is the sweet, creamy glaze. In a medium bowl, whisk together the 2 cups of powdered sugar, ¼ cup of milk, and 1 tablespoon of light corn syrup. The corn syrup adds a lovely sheen and helps prevent the glaze from hardening too quickly. Whisk until the glaze is smooth and lump-free. If it seems too thick, add milk a teaspoon at a time until you reach your desired drizzling consistency. If it’s too thin, add a bit more powdered sugar. You’re looking for a glaze that’s thick enough to coat the bombs nicely but thin enough to drizzle easily.
Glazing and Serving
Once your Cherry Pie Bombs have cooled slightly, it’s time for the grand finnon-alcoholic ale: the glaze! You can do this in a couple of ways. You can dip each bomb into the glaze, turning to coat, and then place it back on the wire rack to let the excess drip off. Alternatively, you can spoon the glaze over the tops of the bombs, letting it cascade down the sides. For a fancier presentation, you can put the glaze into a piping bag and create decorative swirls. Serve your Cherry Pie Bombs warm. They are absolutely delightful on their own, but a scoop of vanilla ice cream alongside them is truly something special. Enjoy the explosion of flavor!
Conclusion:
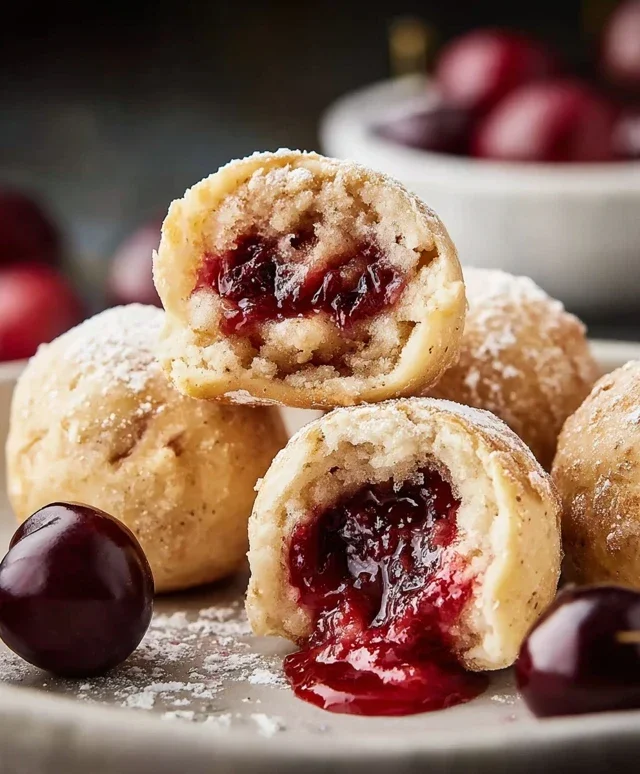
And there you have it – the ultimate guide to creating these delightful Cherry Pie Bombs! I truly believe this recipe is a winner because it captures all the beloved flavors of classic cherry pie in an incredibly convenient and fun-to-eat format. The buttery, flaky pastry encasing the sweet and tart cherry filling is simply irresistible, and the ease of making them means you can enjoy a taste of summer anytime. These little delights are perfect for potlucks, parties, or just a special treat for yourself. Try serving them warm, perhaps with a scoop of vanilla bean ice cream for an extra decadent experience. For variations, don’t be afraid to experiment! You could try adding a touch of almond extract to the filling, or even use a different berry like raspberries or blueberries. I highly encourage you to give these Cherry Pie Bombs a try; they are sure to become a new favorite in your baking repertoire!
Frequently Asked Questions:
Can I make the cherry filling ahead of time?
Absolutely! You can prepare the cherry filling up to 2 days in advance and store it in an airtight container in the refrigerator. This can save you time on the day you plan to assemble and bake your Cherry Pie Bombs.
What if I don’t have fresh cherries?
No problem! You can definitely use frozen or canned cherries. If using frozen, make sure to thaw them and drain them well. For canned cherries, opt for those packed in water or light syrup and drain them thoroughly before using to prevent a watery filling.
How should I store leftover Cherry Pie Bombs?
Store any leftover Cherry Pie Bombs in an airtight container at room temperature for up to 2 days, or in the refrigerator for up to 4 days. They are delicious at room temperature or gently reheated in a warm oven.
Cherry Pie Bombs
Deliciously sweet fried biscuit dough filled with cherry pie filling and drizzled with a powdered sugar glaze. A fun and easy dessert treat.
Ingredients
-
Vegetable oil, for frying
-
16.3 ounces Grands “Big” biscuits, flaky
-
21 ounces cherry pie filling
-
2 cups powdered sugar
-
¼ cup milk
-
1 tablespoon light corn syrup
Instructions
-
Step 1
Carefully open the biscuit packaging. Gently separate each biscuit. Flatten each biscuit slightly with your hands. -
Step 2
Place about 1-2 tablespoons of cherry pie filling into the center of each flattened biscuit. Fold the edges of the biscuit up and around the filling, pinching firmly to seal completely. Ensure no filling can escape. -
Step 3
Heat about 2-3 inches of vegetable oil in a deep, heavy-bottomed pot or Dutch oven over medium-high heat to 350°F (175°C). -
Step 4
Carefully place 3-4 cherry pie bombs into the hot oil, being careful not to overcrowd the pot. Fry for 2-3 minutes per side, or until golden brown and puffed. -
Step 5
Using a slotted spoon, remove the fried cherry pie bombs from the oil and place them on a wire rack set over paper towels to drain any excess oil. -
Step 6
In a small bowl, whisk together the powdered sugar, milk, and light corn syrup until smooth and a drizzling consistency is achieved. -
Step 7
Drizzle the glaze generously over the warm cherry pie bombs. Serve immediately.
Important Information
Nutrition Facts (Per Serving)
It is important to consider this information as approximate and not to use it as definitive health advice.
Allergy Information
Please check ingredients for potential allergens and consult a health professional if in doubt.